-
图文详情
-
产品属性
-
相关推荐
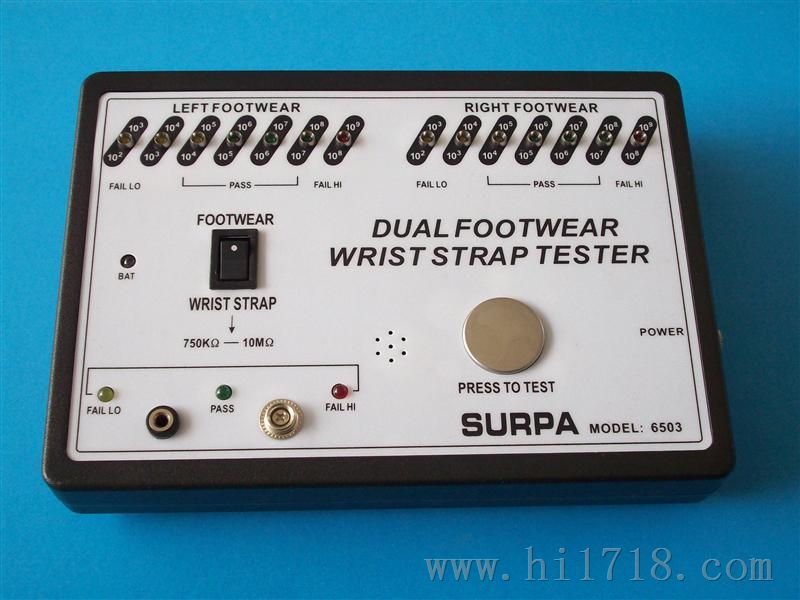
DUALFOOTWEAR/WRIST STRAP TESTER
Model:SURPA-6503
This item isproduced according to ISO/CD8782-I Standard, test the grounding resistance ofanti-static shoe/foot wears and wrist straps &with LED display and alarm,it is a measuring instrument that cannot be short of during static control. Itadopts 9V battery for power supply, with low voltage but safe. It has thealarming function when voltage shortage occurs,height can be adjusted freely.
Operation:
一. Test the anti-static shoes areconductive.anti-static or insulative,judge the grounding resistance of theshoes,left LED indicate left shoes,right LED indicate right shoes:
10E2~10E3 FAIL LO Without alarm, yellow light on
10E3~10E4 FAIL LO Without alarm, yellow light on
10E4~10E5 PASS Green light on
10E5~10E6 PASS Green light on
10E6~10E7 PASS Greenlight on
10E7~10E8 PASS Green light on
10E8~10E9 FAIL HI With alarm, red light on
二、 Push theoption switch to “WRIST STRAP” on the right, put on wrist straps and theninsert the plug or alligator clips into the socket (alligator clips pole) andpress “PRESS TO TEST” key. When the RIGHT indicator light is on, it means theimpedance of the wrist strap.
Test Scope of Wrist Strap:
R〈750K FLIL LO With alarm, yellow light on
750K〈R〈10M PASS Green light on
R〉10M FAIL HI With alarm, red light on
注:仪器测量为+15%以内,可调式精密电阻箱校准。
人体综合测试
How to fix:
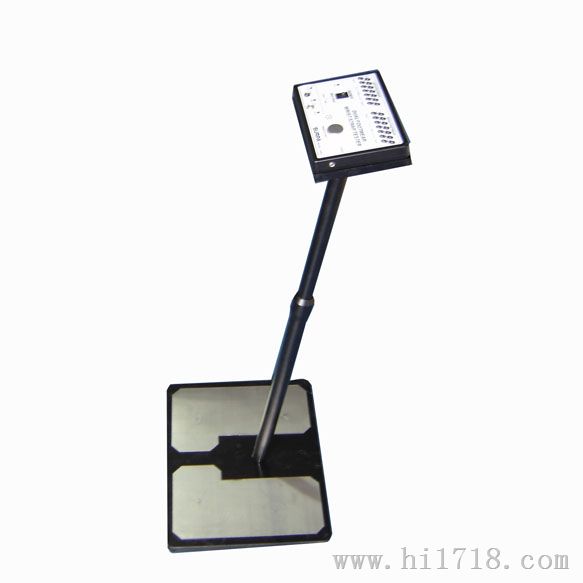
(1) to loose sleeve, and insert bracket through testing board andscrew sleeve. As the chart A.
(2) To separately fix up thelinking lines on the two sides of testing board and fasten the bracked on theboard. (Please well note: Two lines separately correspond two testing loops andthe lines are different from the color, the blue is for the left and black forright.)
(3) to fasten testerbatholith on the bracket and fetch the linking lines out. As the chart B.
(4) to insert the linking lines into the jack of tester, as thechart C, The blue lies on the left and the black is on the right. That isOK. As the chart D.
How to adjust height:
To contrarotatesleeve for several circles, and adjust the bracket to the good height, thenscrew the sleeve.
Hanging Installation:
In order to save time, we can use hanginginstallation. To take the tester out,and use another set of lines. Please install lines according to mark, anotherender of line link to the soleplate. There are two nails with 86MM of distanceon the wall. The user can hang the tester on the nails.


